
CtrlSync - Connecting the M-Files Sample Vault and Microsoft Teams#
In this tutorial, we will show how you can use CtrlSync to connect the M-Files sample vault to a MS Teams resource.
There are some prerequisites for this tutorial; we assume that you are familiar with M-Files Vault administration and that you have access to install a version of CtrlSync.
We also assume that you have access to your company’s installation of Microsoft Teams, i.e. that you have access to your company’s Microsoft Azure administration tools, since CtrlSync requires that you add it as an Azure application on your company’s cloud.
The focus of this tutorial is to familiarize you with the interoperability between M-Files and MS Teams that can be facilitated with CtrlSync.
The Sample Vault#
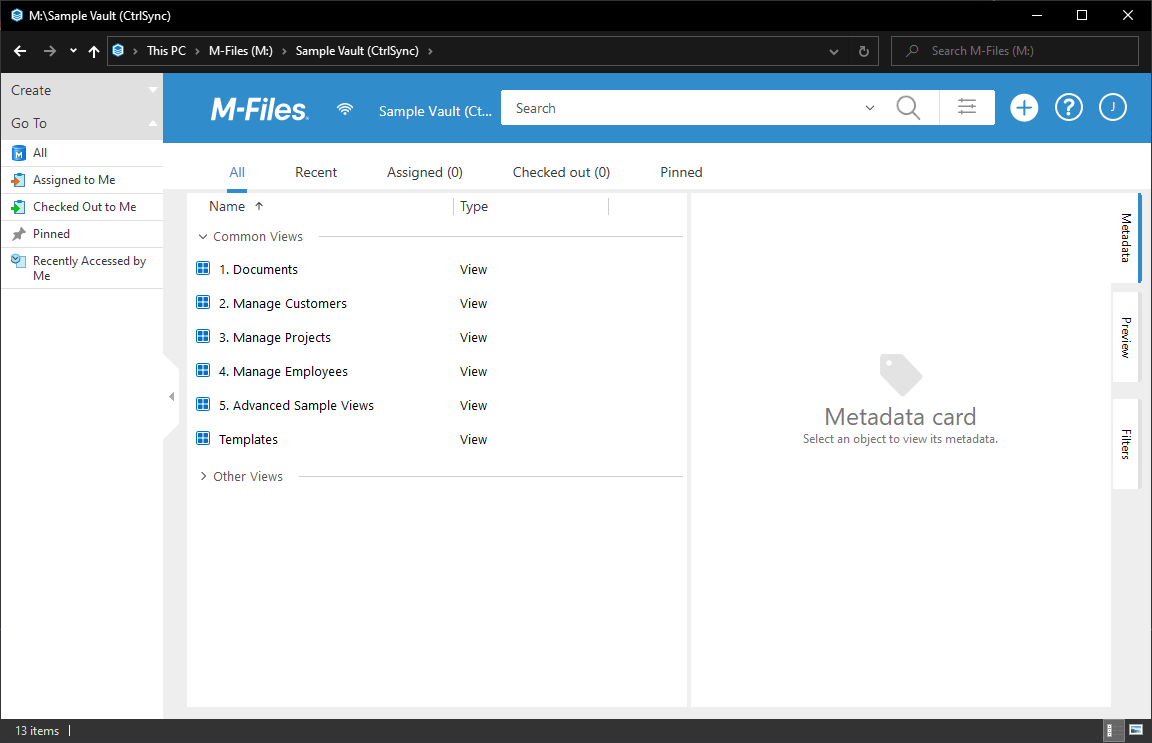
The M-Files Sample Vault might be familiar to you already. It is a very basic example of a CRM system, used to manage customers, projects, employees and invoicing, all of this is available through the different views baked into the vault.
We will not be changing the structure of the Vault much, but instead we will focus on simply ensuring that documents shared on Teams are persisted in M-Files, so that no information is lost.
But before we get ahead of ourselves, we need to install the CtrlSync application.
Installation and Configuration#
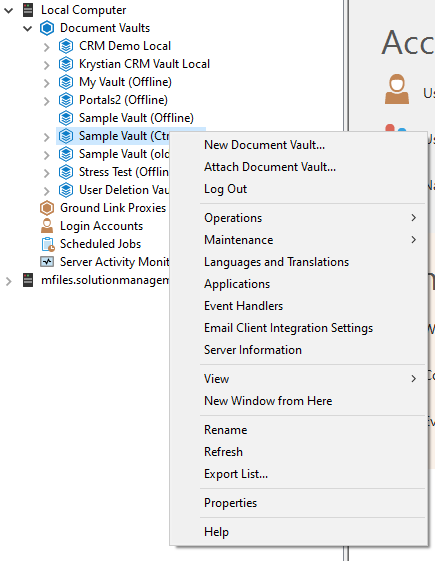
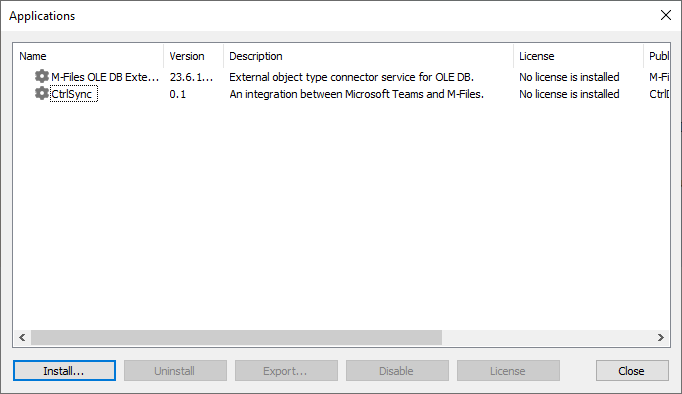
We assume that you already have a copy of the CtrlSync .mfappx file. To install it, open the M-Files administration application and locate the sample vault. Right-click to open the context menu and select ‘Applications’. Then, pick install and select the CtrlSync .mfappx file from your file system. Select the license and add that to the CtrlSync application as well.
Close the application menu and agree to restart the Vault.
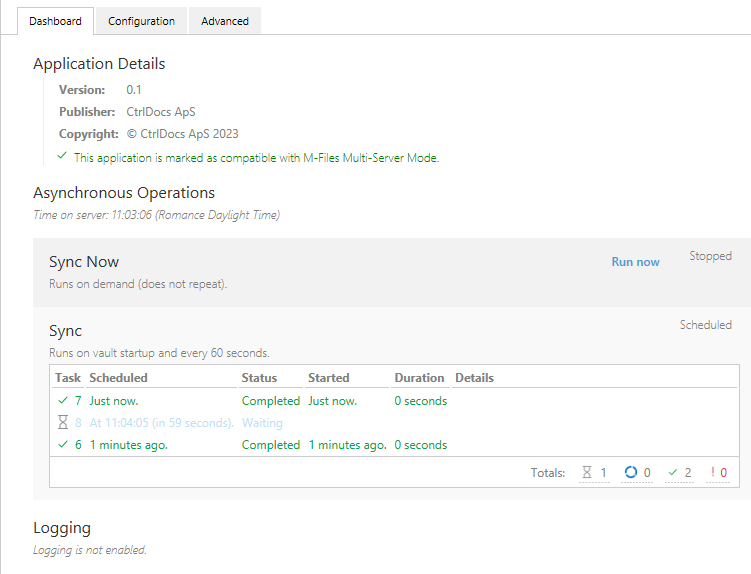
The confirm that the application was installed successfully, open Configurations > Other Applications > CtrlSync. You should be met with the application dashboard.7
Azure configuration#
First, sign in to the Azure portal. Then, in the left-hand menu, click on Azure Active Directory.
From there, click on App registrations and then New registration. You will be prompted to enter a “Name” for your application. After that, if not selected, set the “Supported account types” to “Single-tenant” and leave “Redirect URI” blank. Then hit “Register”.
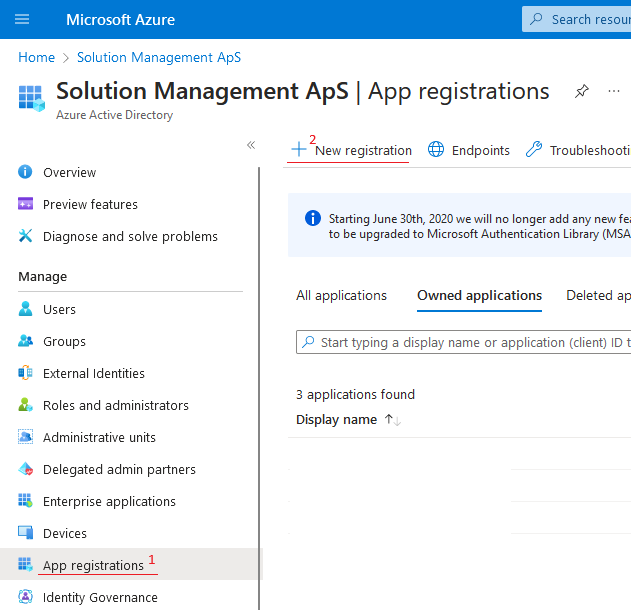
Enter ‘CtrlSync’. After you have filled out all of the necessary information, click on Register.
Once you have registered your application, you are taken to a page where you can view your Application (client) ID. This is your client ID.
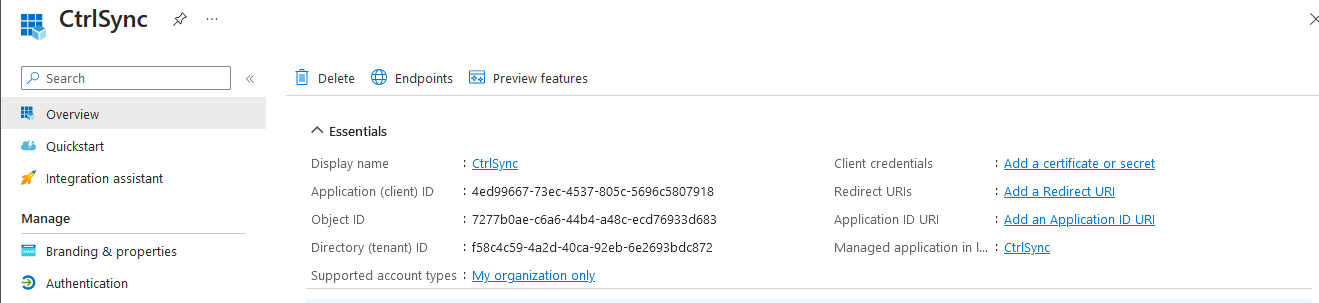
To create a client secret, click on Certificates & secrets in the left-hand menu. From there, click on New client secret and enter a description for your client secret along with an expiration date.

Once you have done that, click on Add, and your new client secret will be displayed in the list of client secrets.
Save the client ID, tenant ID, and client secret for later use; keep in mind that the client secret is only shown once because it is a secret. So don’t save this on your computer, but keep it open in notepad or other text editor. Remember to delete it afterward.
Now, before we can connect the application, we need to setup permissions for our application so that it can read files and groups from Teams and MS SharePoint.
So, go to the ‘API Permissions’ menu for your Azure application and add the following permissions:
API / Permissions name |
Permission Type |
Description |
|---|---|---|
Directory.Read.All |
Application |
Allows CtrlSync to read all directory information from MS Graph, i.e. names of every folder in MS Teams, OneDrive, SharePoint, etc. |
Files.Read.All |
Application |
Allows CtrlSync to read all files in all site collections. |
Group.Read.All |
Application |
Allows CtrlSync to read all groups stored in MS Graph |
Team.ReadBasic.All |
Application |
Allows CtrlSync to read a list of all your organization’s MS Teams Teams |
To do this, press ‘+ Add a permission’ button and select the Microsoft API ‘Microsoft Graph’. Then select Application permissions.
Here you can select all the required permissions. Once you are done, your permissions table should look a bit like the one we’ve shown above.
Now, if you are not an administrator of your Azure domain, each permission will say that it is awaiting approval from an administrator. If that is the case, make sure to contact an administrator, CtrlSync will not function without these API permissions.
M-Files Configuration#
Open the CtrlSync configuration and fill in the client ID, client secret, and tenant ID with the relevant information from your Azure application portal.
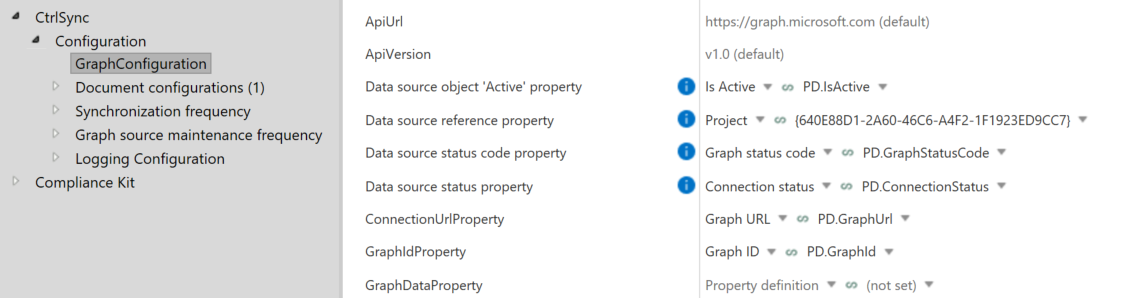
Then, we must configure the object type that connects M-Files with the Microsoft Graph. The Graph source could also be any site that is already part of your business model, e.g., a direct representation of a Team or a SharePoint site. But, we recommend creating a new object with a Graph source from scratch and referencing it when relevant.
Right-click your Vault’s Metadata structure (Hierarchical View) and add a select the relevant Object Type. In our example we are going to focus on Projects, but it could be any other object in M-Files.
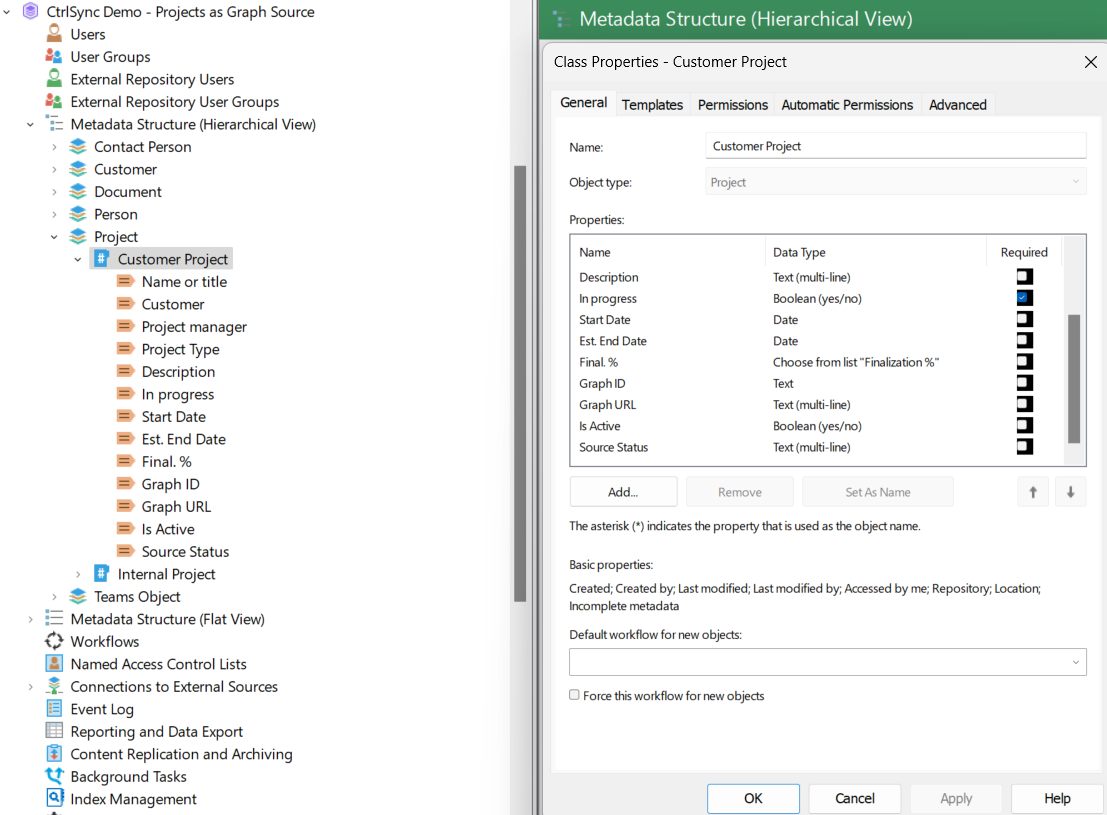
Create the Customer Project object class and add the following properties:
Graph ID Property:
In the “Customer Project” class properties tab, click the “+ Add Property” button.
Name the property “Graph ID”.
Set the property type to “Text” or “Multi-line Text”.
Click “OK” to save the property.
Graph URL Property:
Name the property “Graph URL”.
Set the property type to “Multi-line Text”.
Set the content type to “Hyperlink”.
Click “OK” to save the property.
Source ‘Is Active’ Property:
Add another property and name it “Is Active’”.
Set the property type to “Boolean”.
Click “OK” to save the property.
Source Status Property (Optional):
To add the optional “Source Status” property, follow the steps mentioned earlier, naming the property “Source Status” and setting it as a “Multi-line Text” property.
Graph Data Property (Optional):
To add the optional “Graph Data” property, repeat the above steps, naming the property “Graph Data” and setting it as a “Multi-line Text” property.
Path Property (Optional):
To add the optional “Path” property, repeat the process, naming the property “Path” and setting it as a “Multi-line Text” property.
Custom Created-By Property (Optional):
To add the “Custom Created-By” property, create a new property and name it “Custom Created-By”.
Set the property type to “Choose from list” and select the “Users” value list.
This property will help you track the user who created an incoming document in Microsoft Graph/Teams, regardless of whether the user has an M-Files account.
Custom Last Modified-By Property (Optional):
Similarly, add another property and name it “Custom Last Modified-By”.
Set the property type to “Choose from list” and select the “Users” value list.
This property will help you track the user who last modified an incoming document, regardless of whether the user has an M-Files account.
Setting up CtrlSync properties#
Now, in the M-Files config for CtrlSync, add the newly-created properties to the list of properties.
Setting up a Team#
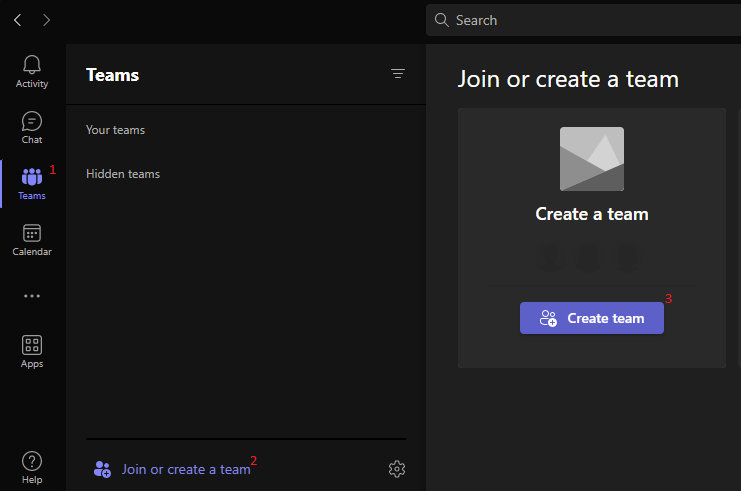
Now that we can make objects in M-Files that reference objects in the Microsoft Graph, let’s create an object to test with. Open the Microsoft Teams app, go to the Teams menu, and click ‘Join or create a team’. Then click ‘Create a team’. Then click ‘From scratch’. Then click private. Then fill in the team name. Then click ‘create Team’. Then click the skip button.
Now, find your team in the Teams’ list and click the three dot menu. Select the option ‘get link to team’. Copy the link.
Adding a Graph Source#
Open your M-Files vault and add a new Project object. In the Source URL property, insert the link for your team.
Change the Graph Source’s status to active.
At this point, you can try uploading a file to the general chat of your test team. But nothing happens!
This is because we still need to configure how our Graph source should import files from teams.
Basic Document Configuration#
First, we’ll make a simple document configuration, but you can read more about the general concepts on the documentation page.
Open the CtrlSync configuration and go to ‘Document configurations’. Here, add a new document configuration.
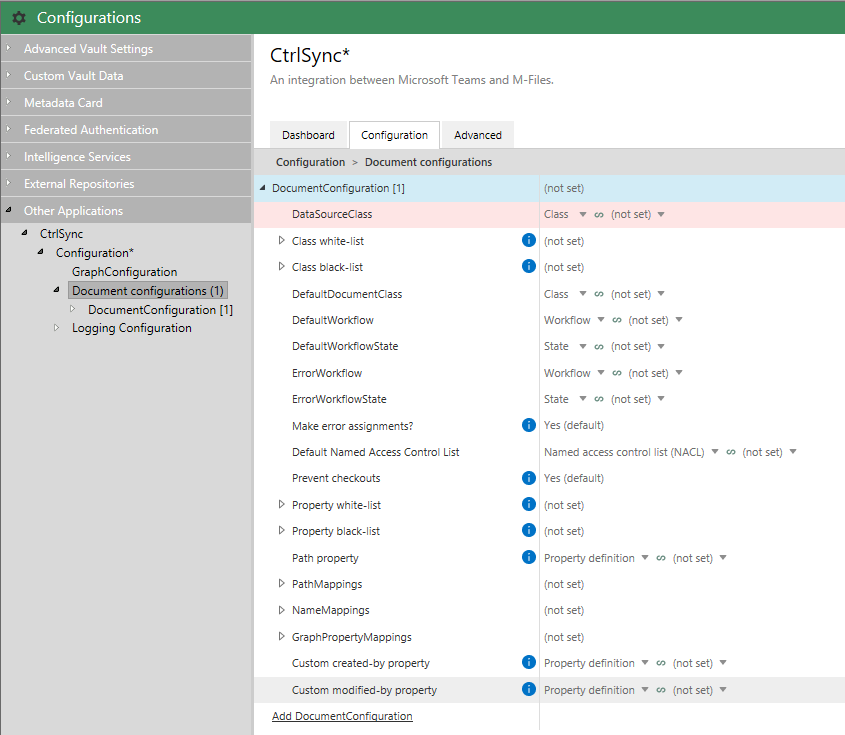
Then, set the ‘GraphSourceClass’ to your graph source’s class. In this case it is the Customer Project class. Note that you can use different configurations and apply them to different classes.
Simply select ‘Document’ for the default document class.
That’s it; now the files that we upload to our test Team should be imported into M-Files as regular documents.
Advanced Document Configuration#
Here is a more advanced example of the Document Configuration:
Set up PathMappings:
This is how your configuration should look like:

We have developed a smart way to automatically sync the folders between Teams and M-Files. The idea is to match the folders that end with “s” inside the Teams folder structure with the document classes we created in M-Files: (Agenda)s, (Memo)s, (Project Plan)s, (Report)s.
Here is how to set it up:
Right-click on the PathMappings and select “Add PathPropertyMapping”.
Select “Class” as the Matching property.
Then, set “No” in the Set once? field.
The MappingType should be set to “Regex”.
Following that, paste the following formula: (?:.*/)?([\w\s]+)s$
You should use Aliases in case you encounter issues when one of your document classes is called like the default M-Files classes i.e. Document or Report. In that case:
Add another class PathPropertyMapping.
Select “Class” as the Matching property.
Right-click on the Aliases and select “Add TypedValueAlias”.
Set the Alias to “Reports”.
Assign a “Static value” mode and select the “Report” document class.
Once that is done, set “No” in the Set once? field.
Finally set the MappingType to “Last”.
To sum up, by using a Aliases you can manually select what Teams folders should be synced to M-Files.
Set up GraphPropertyMappings:
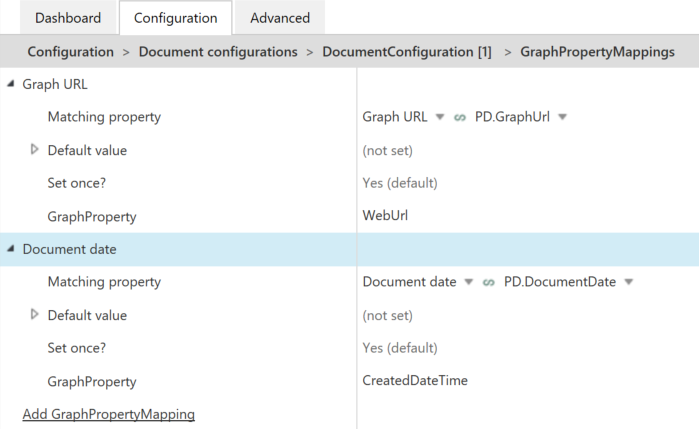
WebUrl represents the URL to the object in MS Graph. It can be used to provide a link to the document.
CreatedDateTime represents the timestamp for when the object was created in MS Graph.