CtrlTime - setting up a dedicated portal#
In this section, we will explain how you can add a Calendar component to a dedicated “Week” portal, which serves as an essential part of the timesheet drafting process. It enables you to easily keep track of your weekly schedule and ensure that your timesheets are accurate.
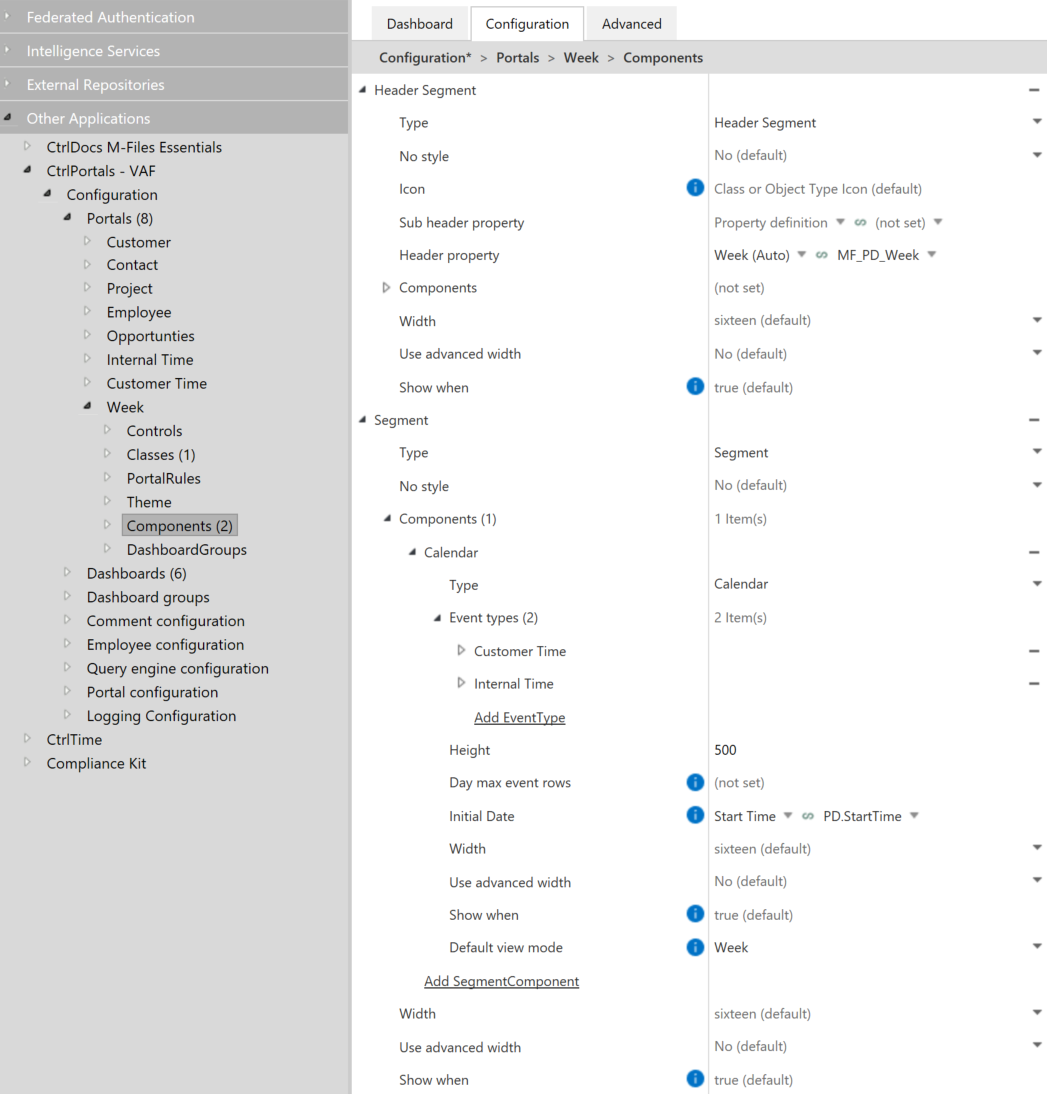
First, go to the CtrlPortals configuration entry and expand Portals and create the “Week” Portal. Then, add a new Segment and select a Calendar component.
Optionally, you can add the Header Segmentto get an appropriate title e.g. Week(Auto).
Adding the Event Types#
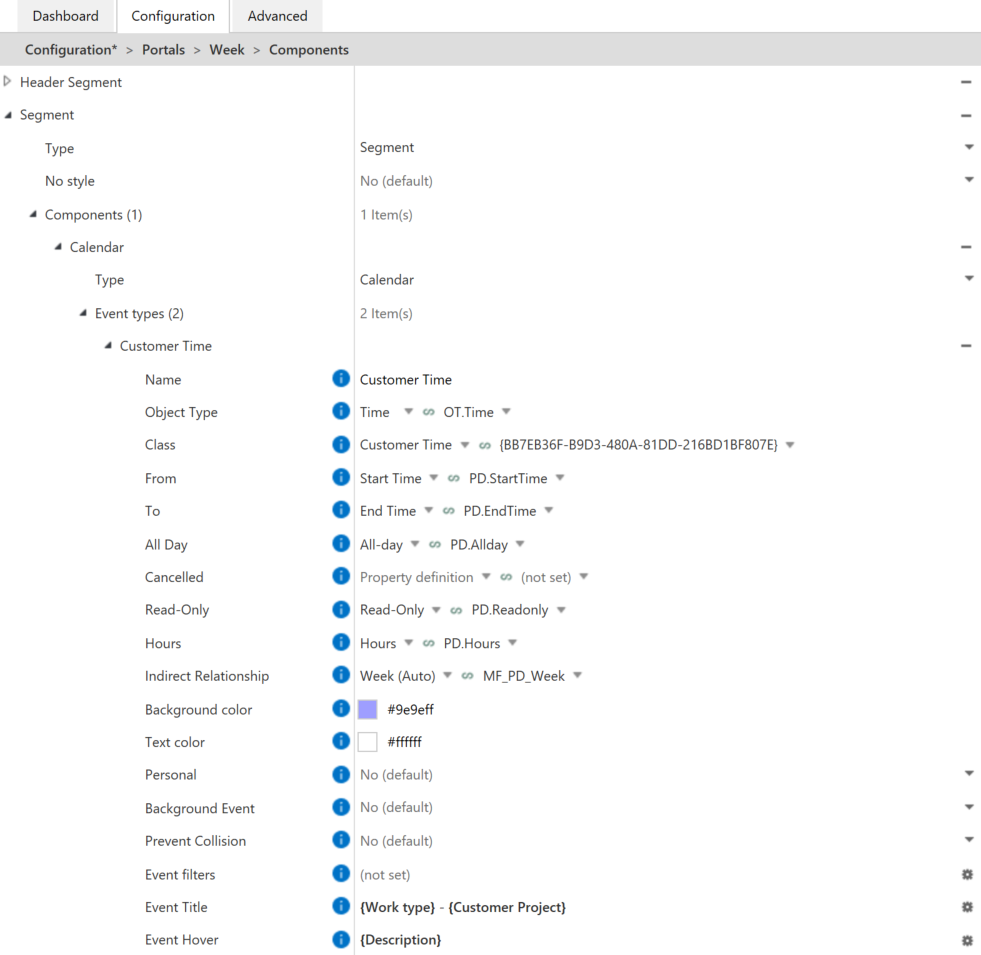
Simiraly to previous dashboard example, you need to add the Customer and Internal Time Event Types.
The difference here is that you need to:
add the
Indirect Relationshipand set it toWeek(Auto)remove
Personal Relationshipoptionally, change the color shade to differentiate the visual identification.
Here are some screenshots to help you visualize the process:
Customer Time#
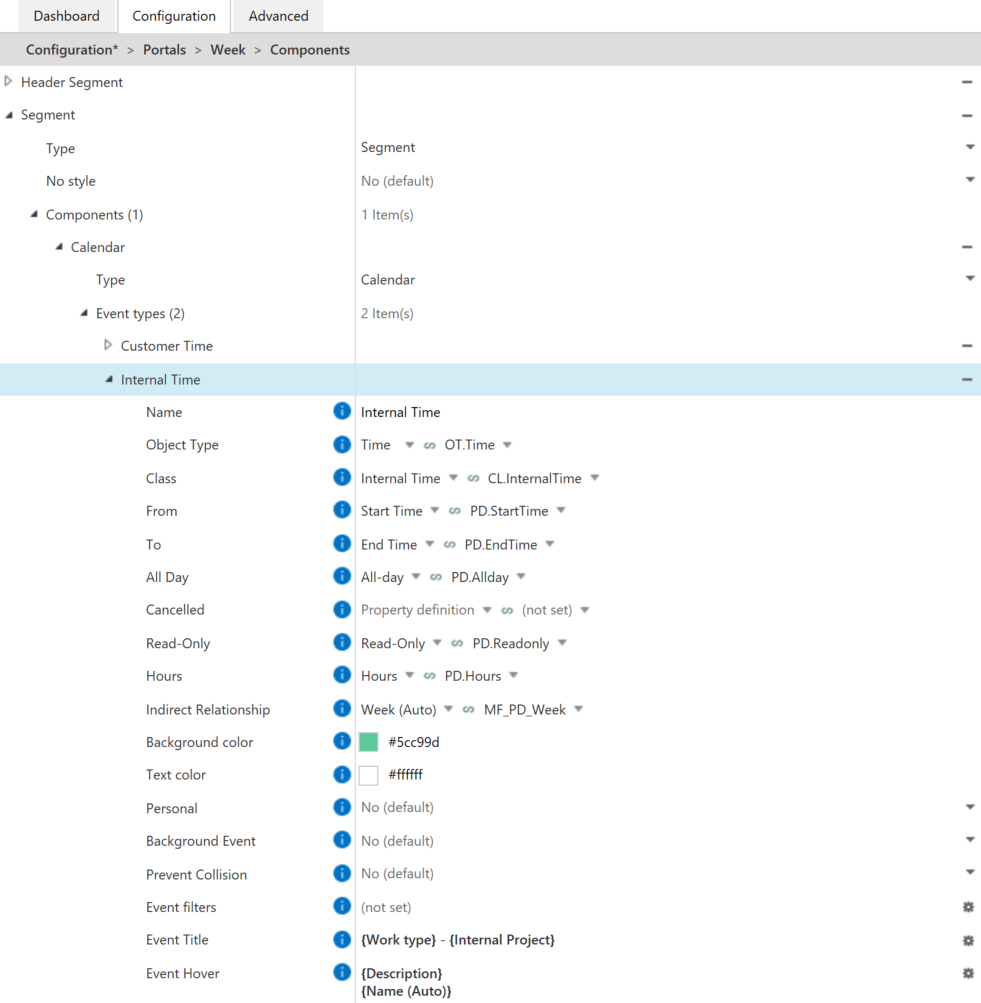
Internal Time#
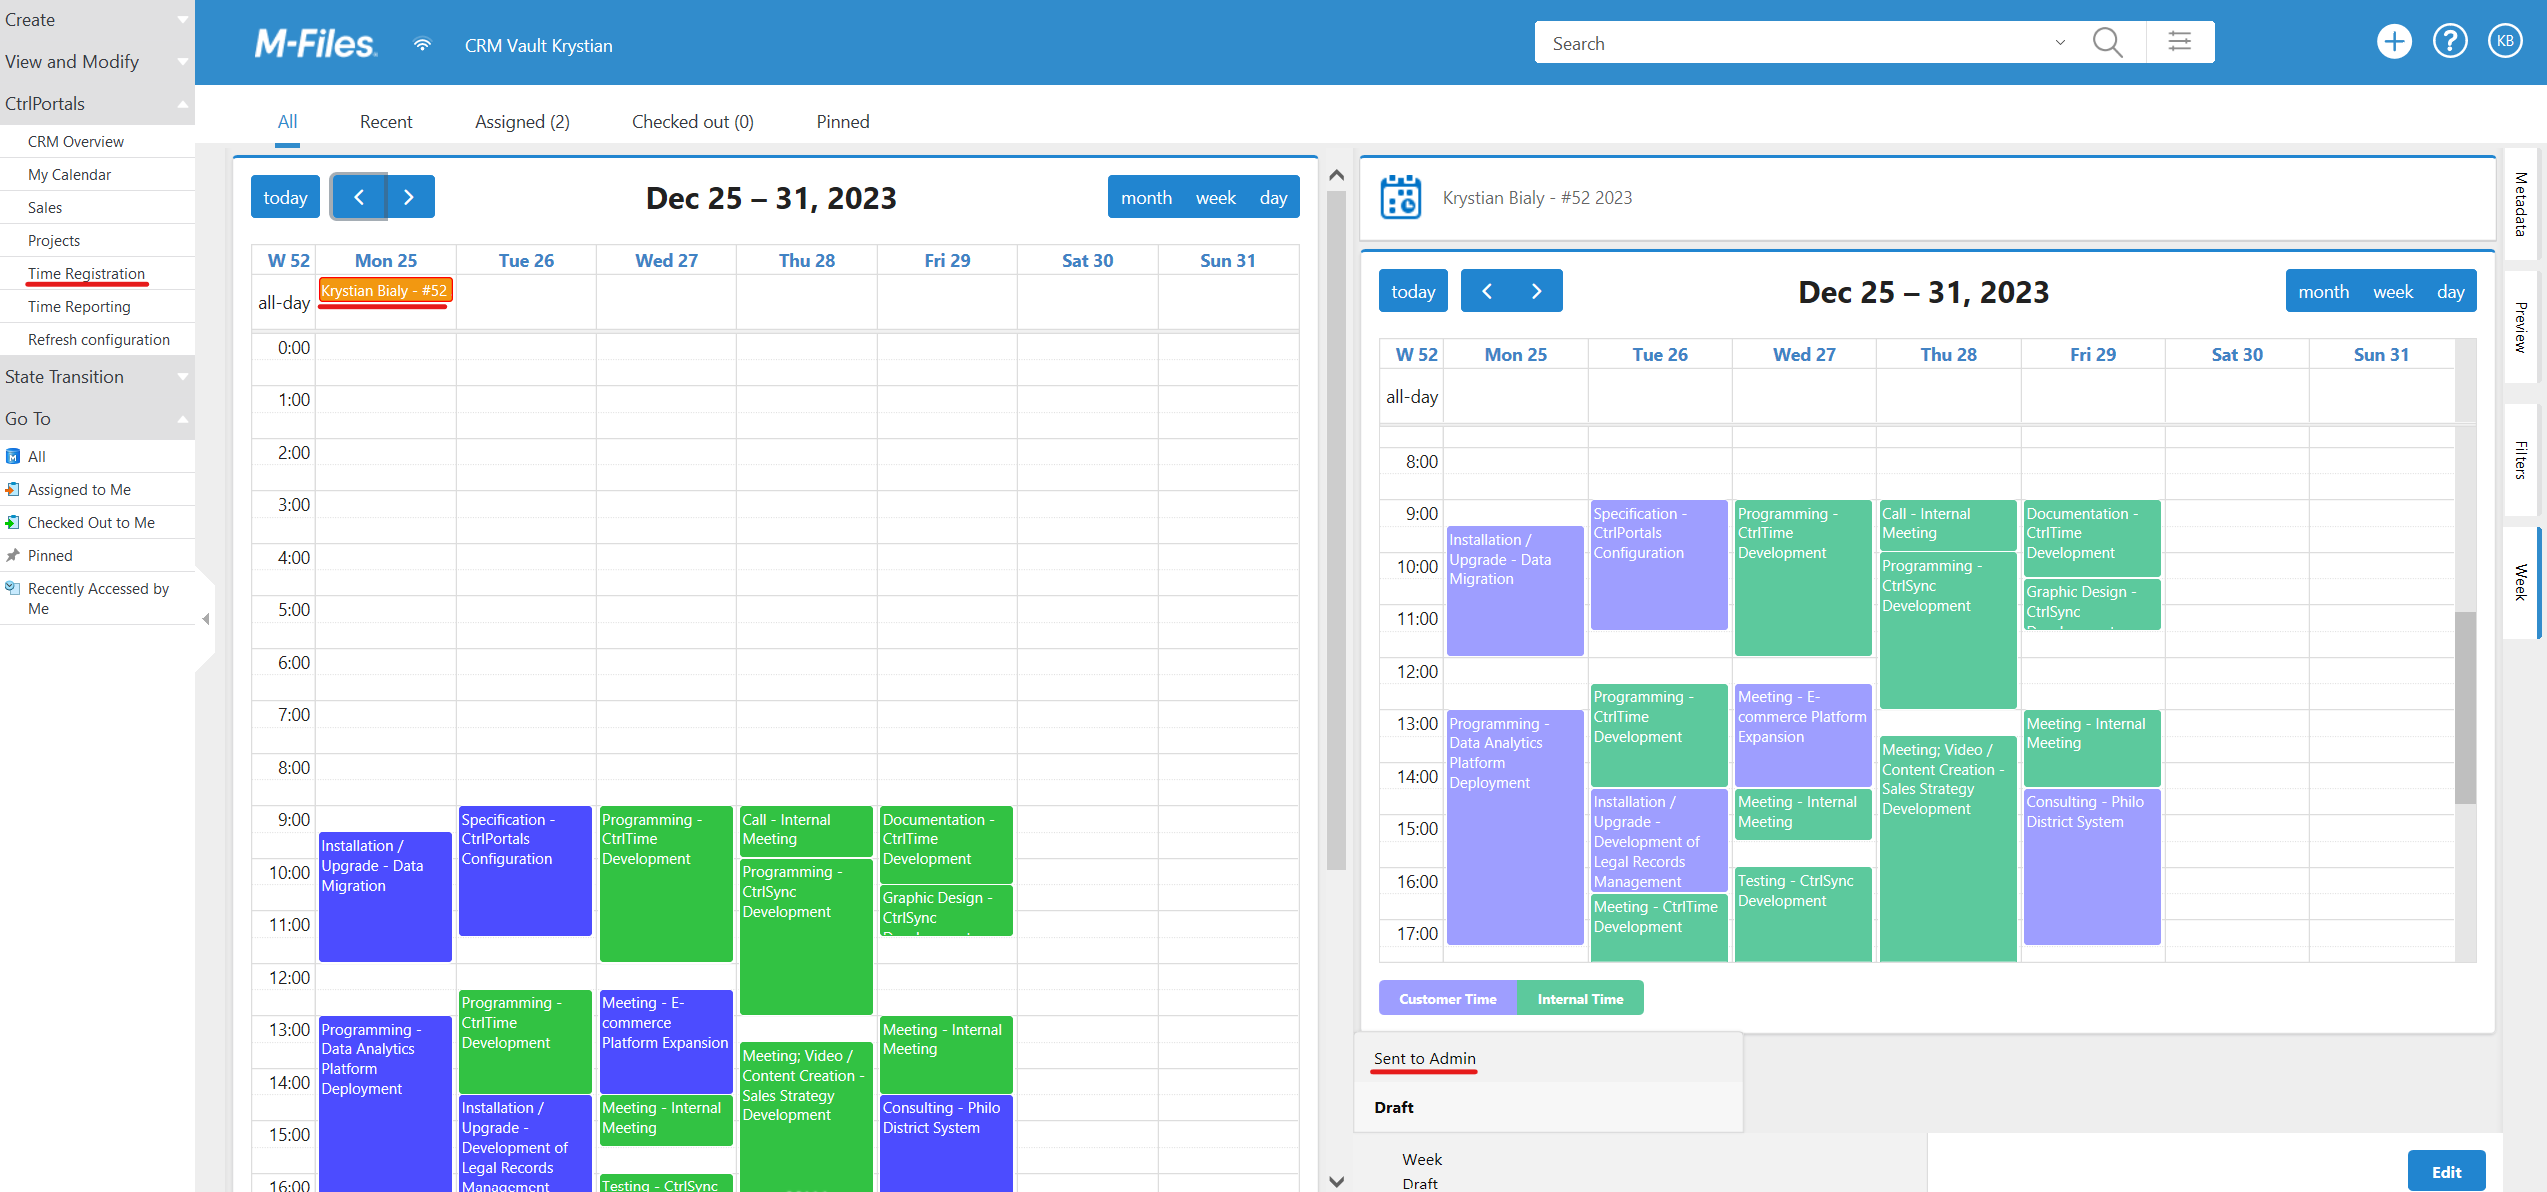
Sending hours for approval#
Access the Time Registration dashboard and locate the week object in the top-left corner. From the right-pane you will see the Week Portal that we set up earlier. From there you will be able to change the workflow state from “Draft” to “Sent to Admin”. Once that is done, the timesheet will proceed through to the final review and admin processing.