CtrlTime - Adding a Calendar to the Vault#
Before you begin, ensure you have read the installation and configuration steps outlined in the previous tutorial to better understand how the Calandar component can be set up.
In this example, we will show how you can add a Calendar to a “Time registration” dashboard .
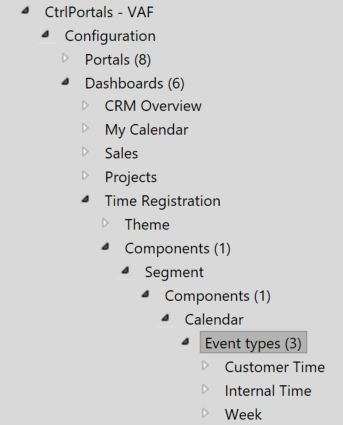
Go to the CtrlPortals configuration entry and expand Dashboards. Now create the new dashboard and call it “Time Registration”.Then, add a new Segment and select a Calendar component
Adding the Event Types#
Here is a demonstration of how you need to set up the Event Types inside the Calendar component.
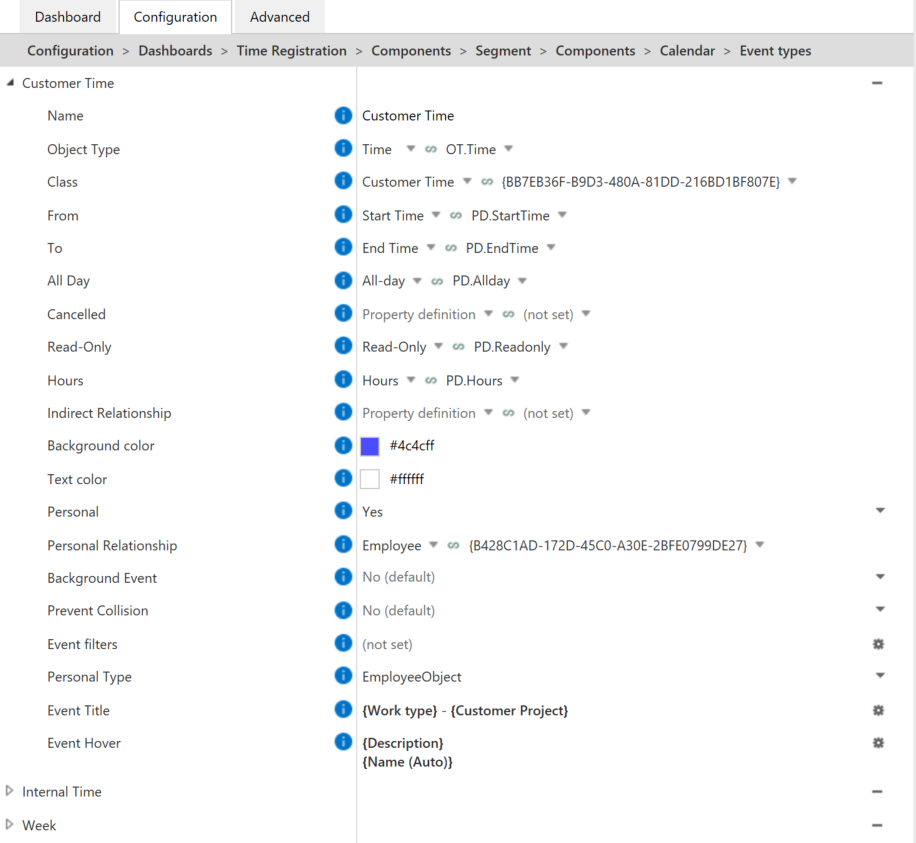
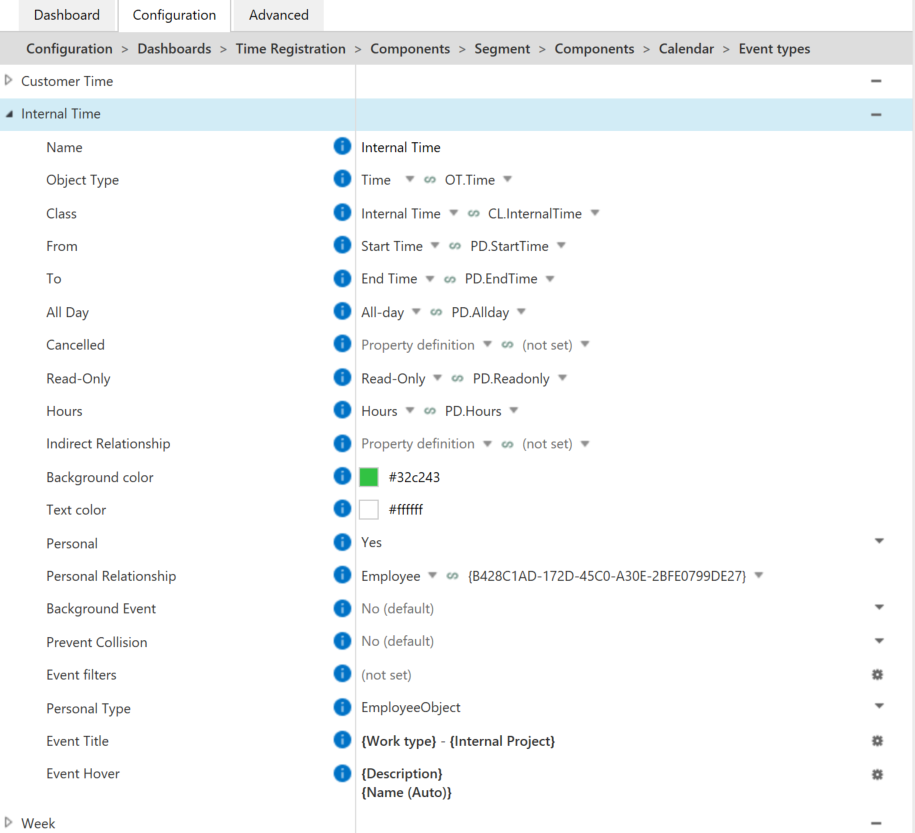
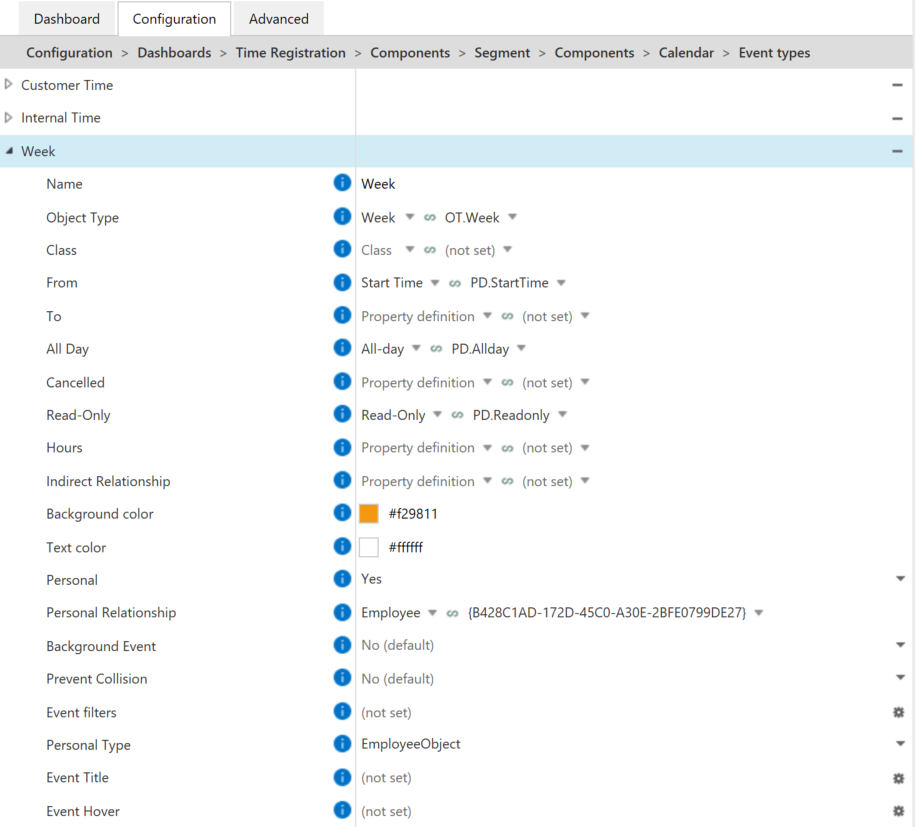
Remember that you can edit which metadata is relevant to display in a specific calendar. You can do that by changing the Event title and Event Hover. Add the placeholder text by clicking on the settings icon on the right-hand side.
Setting up the workflow#
Here is a short descripiton of how a simle Week Workflow could look like:
Draft: when the object moves into this step, set the oroperty All-day to use “Yes” as fixed value. Optionally, apply the appropriate permissions on the state transition.
Sent do Admin: when the object moves into this step, assign it to the manager or administration.
From here the timesheet can be either Approved or Rejected and go back to the Draft state.
Configuring CtrlTime#
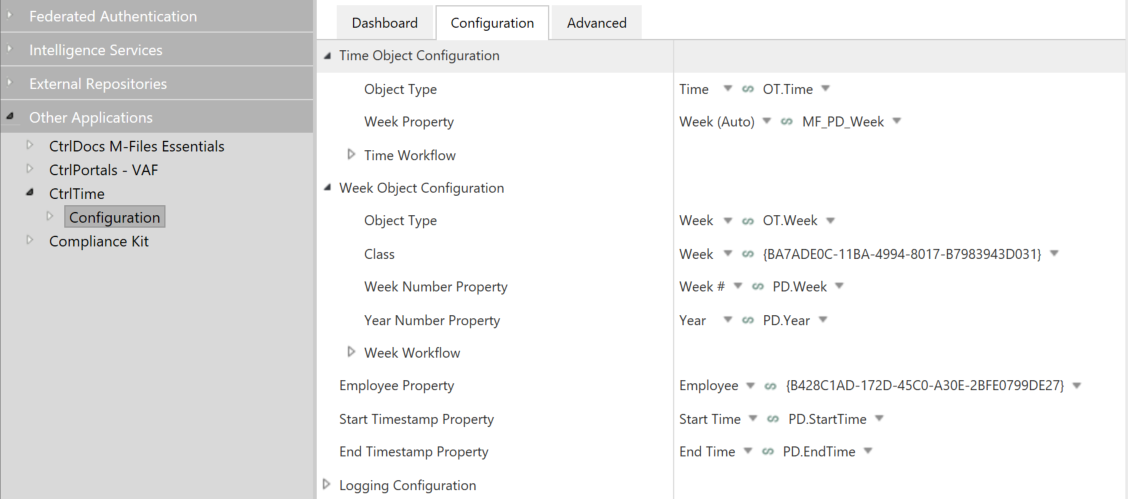
Go to the CtrlTime configuration entry and expand Time Object Configuration and TWeek Object Configuration and set up the properties in the following way:
